
If you’re looking to enhance your outdoor space, knowing how to level pavers is essential. Properly leveled pavers ensure a flat, aesthetically pleasing surface that lasts. This comprehensive guide will walk you through each step of the process, from preparation to the finishing touches. Whether you’re a DIY enthusiast or a first-timer, this article will equip you with the knowledge to successfully level your pavers.
Table of Contents
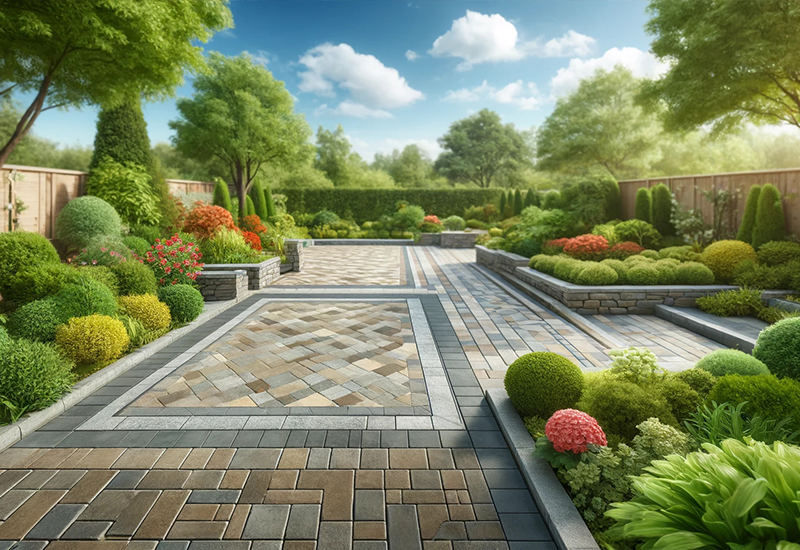
Understanding the Basics of How to Level Pavers
Before diving into the leveling process, it’s important to understand why proper leveling is crucial. Level pavers not only enhance the aesthetic appeal of your outdoor spaces but also prevent water accumulation and structural damage. We’ll explore the tools and materials needed, setting a strong foundation for your project.
Preparing the Base for Leveling Pavers
Creating a solid and level base is critical for the longevity and aesthetics of your paver project. Let’s walk through the essential steps involved in preparing the base to ensure that your pavers will be stable and well-supported.
Assessing the Area
Before you grab your shovel, take a good look at the area where you plan to lay the pavers. Clearing the site of debris, rocks, and weeds is your first step. Once it’s clear, assess the firmness of the ground. Is it soft and muddy, or hard and dry? The type of soil can greatly impact the base materials you may need and the depth of excavation required. Make sure the ground doesn’t have any issues like excessive moisture or instability. If it does, addressing these issues now will save you trouble down the road.
Digging and Grading
Now that you’ve prepared the site, it’s time to start shaping it to suit your paving needs. Digging to the right depth is crucial—usually between 7 to 9 inches, depending on the paver height and the base layers. Once you’ve dug out the soil, grade the area. Grading involves sloping the surface slightly to ensure proper drainage. Aim for a slope of about 1 inch for every 4 feet of length, directing water away from buildings and towards appropriate drainage areas. This step prevents water from pooling beneath the pavers, which could lead to shifting and damage over time.


Materials and Tools Needed
To lay pavers correctly, having the right materials and tools is just as crucial as preparing your base. Let’s break down what you’ll need to ensure your project is a success from the ground up.
Choosing the Right Sand
Selecting the right sand for both your base layer and the filling between joints is critical. For the base, you’ll want to use coarse, sharp sand. This type of sand compacts well but still allows for proper drainage. It’s typically labeled as ‘all-purpose sand’ or ‘sharp sand’ at your local hardware store.
For filling the joints between the pavers, however, finer sand is preferable because it settles well into the spaces and helps lock the pavers together once compacted. Polymeric sand is a great option for joint filling. It includes a binder that helps it stay put and resist weeds and ants better than regular sand.
Essential Tools
Getting your hands on the right tools can make the difference between a project that looks professional and one that looks like it needs professional help. Here’s what you’ll need:
- Level: A long level is indispensable for ensuring your base material and pavers are laid flat.
- Tamper: This tool is used to compact the base material evenly. You can use a hand tamper for small areas or rent a plate compactor for larger projects.
- Rubber Mallet: This is used to gently tap pavers into place, ensuring they are level without cracking them.
- String Line: String lines help keep your paver rows straight and true.
- Landscape Fabric: Placing landscape fabric between the soil and the base material can help prevent weed growth and keep the base material from mixing with the soil.
- Wheelbarrow and Shovels: Essential for moving and spreading sand and base material.
- Paver Saw: For any custom cuts needed to fit pavers around corners, edges, or obstacles.
Laying the Base: How to Level Pavers
A well-laid base is the backbone of your paver project. It supports the pavers and ensures they remain flat and stable for years. Let’s explore how to effectively lay and level your base.
Spreading the Base Material
Once you’ve got your base material, which is usually a mix of crushed stone and sand, it’s time to spread it evenly across the prepared area. Start by dumping the base material into the excavated area using a wheelbarrow. Spread it out with a rake to an even thickness. The goal here is to achieve a uniform layer that’s about 4 to 6 inches deep, depending on the use of the paved area (walkways need less depth compared to driveways, which bear more weight).
Now, grab your tamper or a plate compactor. Compact the base material thoroughly. This step is crucial; a well-compacted base prevents the pavers from shifting over time. It might take a few passes to get it solid and even. After compacting, check the depth with a measuring tape to make sure it’s consistent across the area. If needed, add more material and compact again until the desired depth and firmness are achieved.
Checking for Level
With the base material laid and compacted, the next step is to ensure it’s perfectly level. This is where your level comes into play. For longer stretches, you can use a laser level or a string line with a standard spirit level to check that everything is flat and even.
Start by setting up your laser level at one end of the area. As the laser beam projects across the base, use a receiver to check that the height of the laser matches across the entire base. Adjust the receiver up and down the grade stick to measure the level accurately. For manual checking, place your spirit level on a straight plank that spans a large section of the base. Adjust the base material as needed by adding or removing some until the bubble in your level is centered.
Installing the Pavers: Steps on How to Level Them
Now that your base is ready, it’s time to start installing the pavers. This phase is where your project begins to take shape visually, and where precision really counts.
Laying Techniques
Laying pavers is like putting together a big, heavy puzzle. You want to make sure every piece fits just right. Start by setting your first paver in the corner of the area and continue laying your pavers closely together. Here’s how to keep everything straight and uniform:
- Use String Lines: Stretch a string line along one edge of the area to guide your first row of pavers. This ensures your installation starts off straight.
- Keep the Lines Tight: As you place each paver, use spacers if necessary to keep the joints uniformly wide. Consistent joint width helps maintain the pattern and enhances the overall appearance.
- Tap into Place: Gently tap each paver into place with a rubber mallet. This helps bed the pavers into the sand firmly and levels them at the same time.
- Check Your Work: Every few feet, stop and step back to look at your work. Make sure the rows are straight and the patterns match up as you intended. Adjustments are easier to make before you’ve laid too many pavers.
Following these steps will help you maintain a straight and pleasing pattern, which is key to a professionally looking finish.
Leveling Each Paver
As you lay each paver, it’s crucial to ensure that it is level with its neighbors. Uneven pavers can be a tripping hazard and can cause water to pool in unwanted areas. Here’s how to get them just right:
- Set the Paver in Place: Lay the paver onto the sand base.
- Use a Level: Place a small level on top of each paver as you lay it to check that it sits evenly with the surrounding pavers.
- Adjust as Needed: If a paver is too high, lift it, remove some sand, and reposition it. If it’s too low, add a bit more sand underneath it.
- Compact Again: Once all pavers are laid and level, go over the area with a plate compactor again. This helps settle the pavers into the sand and evens out any minor discrepancies.
By taking your time to level each paver as you go, you’ll ensure a smooth, even surface that looks great and functions well.
Finishing Touches
After your pavers are laid and leveled, a couple of final touches can greatly enhance their longevity and appearance. These steps ensure that your paving stays beautiful and functional, reducing maintenance needs over time.
Filling Joints
Filling the joints between your pavers is crucial not only for the aesthetic finish but also for the structural integrity of the paved surface. Here’s how to do it right:
- Choose the Right Sand: For joint filling, polymeric sand is a great choice because it includes additives that harden when wet, helping to lock pavers in place and prevent weed growth and pest intrusion.
- Sweep It In: Pour the sand over the pavers and use a broom to sweep it into the joints. Make sure to fill the joints completely. This might require multiple passes as the sand settles.
- Compact the Sand: After sweeping the sand into the joints, go over the pavers with a plate compactor again. This helps the sand settle deep into the joints.
- Clean the Surface: Ensure all excess sand is swept off the pavers’ surface. This prevents hazing when the sand is activated.
- Activate the Sand: Lightly spray a mist of water over the pavers, which activates the binding additives in the polymeric sand. Be sure not to over-wet the sand, as this can wash out the polymers.
Taking the time to properly fill the joints will greatly enhance the stability and durability of your paved area.
Sealing Pavers
Sealing your pavers can protect them from the elements and help maintain their new look for years. Here’s why sealing is beneficial and how to choose the right product:
- Protection from Stains: Sealer forms a barrier that can protect pavers from stains caused by oil, food, or organic matter.
- Enhance Color: Certain types of sealers can enhance the natural color of your pavers, giving them a rich, wet look.
- Prevent Weed Growth and Pest Invasions: Sealing the joints can help prevent weeds from sprouting and pests from making homes between your pavers.
- Choosing the Right Sealer: There are different types of sealers available—water-based and solvent-based. Water-based sealers are easier to apply and more environmentally friendly, while solvent-based sealers tend to last longer and enhance color more dramatically.
Apply the sealer using a roller or a sprayer, following the manufacturer’s instructions. Usually, two coats are recommended, with the second coat applied perpendicular to the first.
Maintenance and Troubleshooting

Keeping your paved area in top shape not only extends its life but also enhances its beauty. Regular maintenance and knowing how to troubleshoot common issues are essential skills for any paver owner.
Regular Maintenance Tips
Maintaining your pavers is straightforward and doesn’t require a lot of tools or time. Here are some simple steps to keep your paved area looking as good as new:
- Regular Cleaning: Sweep your pavers regularly to remove dirt and debris. For stains, use a mild detergent and a stiff brush to gently scrub them away.
- Prevent Weed Growth: Even though polymeric sand helps prevent weeds, they can sometimes find a way through. Pull weeds as soon as you see them, or use a natural herbicide for more stubborn growth.
- Check for Moss: Moss can be slippery and damage pavers over time. If you notice moss, remove it with a moss killer specifically designed for pavers and rinse the area thoroughly after application.
- Re-Sand Joints: If you notice sand has washed out of the joints, it’s important to refill them. This prevents shifting and maintains the integrity of your pavement.
- Seal Regularly: Depending on your climate and the type of pavers, resealing every two to three years can protect them from stains and fading.
Following these simple steps will help keep your pavers looking their best and prevent larger issues down the road.
Troubleshooting Common Issues
Even with the best installation and maintenance practices, problems can arise. Here’s how to address some common issues:
- Shifting Pavers: If you notice pavers shifting out of place, this could be due to a poorly compacted base or insufficient edge restraints. To fix, remove the affected pavers, re-compact the base, and reinstall the pavers.
- Sinking Pavers: Sinking often occurs because of water erosion under the pavers or insufficient base depth. Remove the sunken pavers, add more base material, compact it thoroughly, and replace the pavers.
- Efflorescence: This white powdery substance can appear on pavers due to natural salts in the materials. While it usually wears off with time, you can clean it off with efflorescence remover available at home improvement stores.
Addressing these issues promptly can prevent them from becoming more serious and costly. Regular checks and maintenance ensure that your paver installation remains beautiful and functional for years.
Conclusion:
After following these detailed steps on how to level pavers, your outdoor areas should look spectacular and function excellently. However, if you feel the task is beyond your DIY skills and prefer professional assistance, don’t hesitate to contact a qualified contractor. For professional paver installation, you can reach out at +(1) 917-477-9667 to ensure your paving project is handled expertly.
FAQs:
Q: How can I ensure that I properly know how to level pavers for a driveway?
A: To properly level pavers for a driveway, ensure you have a stable sub-base, use the right type of sand, and regularly check for levelness as you lay each paver.
Q: What are the steps involved in learning how to level pavers for a walkway?
A: Learning how to level pavers for a walkway involves preparing a solid base, laying pavers evenly, and filling the joints with sand to keep the pavers in place and level.
Q: Can you explain how to level pavers and prevent them from moving over time?
A: To level pavers and prevent them from moving, use a sturdy edge restraint, ensure proper compaction of the base materials, and apply polymeric sand in the joints for additional stability.
Q: When considering how to level pavers, what materials are best for the base?
A: For leveling pavers, crushed stone or coarse sand are ideal for the base as they provide a stable, level foundation that allows for proper drainage.
Q: How do I maintain the level of pavers once they are installed?
A: Maintain the level of your pavers by periodically checking for settlement or shifting, refilling joints with polymeric sand, and sealing the pavers to protect against weather and wear.