
If you’re grappling with how to repair cracked brick, you’re navigating a common yet critical home maintenance issue. Cracked bricks, often overlooked, can lead to significant structural problems if not addressed promptly. This guide aims to empower homeowners with practical, step-by-step instructions for repairing cracked bricks, ensuring the safety and aesthetic appeal of their homes. Armed with this knowledge, you can tackle brick repairs with confidence and precision.
Table of Contents
Understanding Brick Cracks
This section delves into the reasons why bricks crack. It explains how environmental factors like temperature changes and moisture, as well as structural issues such as foundation settling and poor construction techniques, contribute to cracking in bricks. This foundational knowledge is critical for both diagnosing the problem and effectively addressing it.
Causes of Brick Cracking: A Key Factor in Repair
Before delving into the intricacies of repairing cracked bricks, it’s pivotal to understand the underlying causes. Bricks, despite their durability, are susceptible to cracking due to a variety of factors. These include:
- Temperature Changes: Bricks expand and contract with temperature fluctuations. In regions with extreme weather changes, this can lead to the formation of cracks.
- Moisture: Water can seep into bricks and mortar. When it freezes, it expands, causing the brick to crack. Similarly, excessive moisture due to rain, flooding, or poor drainage can weaken the brick structure.
- Foundation Settling: Over time, a house’s foundation may settle. This natural process can cause bricks to shift and crack, especially if the settling is uneven.
- Poor Construction: Inadequate workmanship, like improperly mixed mortar or rushed bricklaying, can lead to weak points that eventually crack.
- Age of Structure: Older buildings may show cracks simply due to the wear and tear of time.
Types of Brick Cracks and Their Repair Methods
Understanding the type of crack is crucial in determining the appropriate repair strategy. Common types include:
- Hairline Cracks: These are thin, superficial cracks that often don’t pose a structural threat. However, they can worsen over time if ignored.
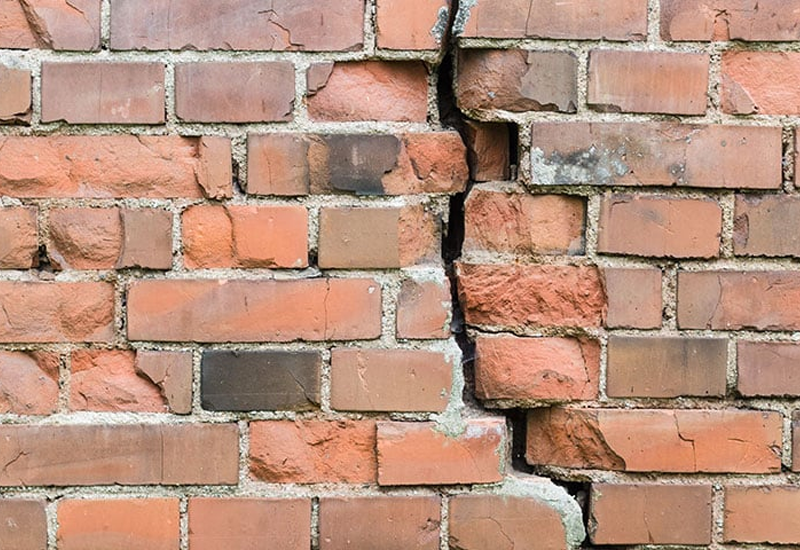
- Stair-Step Cracks: These cracks follow the mortar joints in a pattern resembling stair steps. They usually indicate differential settling or heaving of the foundation.
- Horizontal Cracks: Often a sign of significant pressure or structural stress, horizontal cracks need immediate attention.
- Vertical Cracks: These are typically due to natural settling or ground movement. While less severe than horizontal cracks, they still require repair to prevent water infiltration.
Preparing for Brick Repair: Essential Steps
Here, the focus shifts to the initial steps required before starting the repair process. It covers the importance of assessing the damage to understand the severity and extent of the cracks. Additionally, it provides a comprehensive list of materials and tools needed for the repair, such as a masonry chisel, hammer, wire brush, mortar mix, trowel, pointing tool, sponge, and safety gear, emphasizing the importance of preparation in ensuring a successful repair job.
Assessing Brick Damage for Repair
A thorough assessment of the cracked bricks is crucial. Evaluate the depth, length, and width of each crack. Consider whether the crack is superficial or indicative of a deeper structural problem. This assessment will guide the materials and methods used for repair.
Gathering Tools and Materials for Brick Crack Repair
For the repair process, you’ll need specific tools and materials:
- Masonry Chisel: For removing loose material.
- Hammer: Assists in chiseling and other tasks.
- Wire Brush: Essential for cleaning out the cracks.
- Mortar Mix: Choose a type that matches the existing mortar in color and composition.
- Trowel: For applying and shaping the mortar.
- Pointing Tool: Helps in finishing the mortar joints.
- Sponge: Useful for cleaning and keeping the area moist.
- Safety Gear: Gloves, goggles, and a dust mask are essential for personal protection.


The Repair Process
This crucial section outlines the step-by-step process of repairing cracked bricks. It begins with cleaning the cracks to remove loose material, followed by preparing and applying the mortar. Detailed instructions are provided for each step, including mixing the mortar, applying it to the cracks, and techniques for ensuring a smooth, consistent finish. The section concludes with guidance on allowing the mortar to cure properly, which is vital for the longevity of the repair.
Step 1: Cleaning the Crack
Begin by removing any loose or damaged material within the crack using your masonry chisel and hammer. This step is crucial for ensuring the new mortar adheres properly. After chiseling, use the wire brush to clean out any dust or debris. The crack should be as clean as possible before proceeding.
Step 2: Preparing the Mortar
Mix the mortar according to the manufacturer’s instructions, aiming for a firm but workable consistency. It’s important to match the new mortar to the old in terms of color and texture to maintain the aesthetic of your brickwork.
Step 3: Filling the Crack
Carefully apply the mortar into the crack using the trowel. Be thorough, ensuring the mortar is well-packed into the crack. Once filled, use the pointing tool to smooth and shape the mortar, mimicking the surrounding joints for a seamless repair.
Step 4: Curing
After the crack is filled, allow the mortar to cure as per the manufacturer’s guidelines. This usually takes 24-48 hours, but it’s essential to keep the area slightly damp by lightly sponging with water. This prevents the mortar from drying too quickly, which can lead to cracking.
Preventing Future Cracks
The final section is dedicated to strategies for preventing future cracks in brickwork. It emphasizes the importance of maintaining proper drainage around the home, addressing foundational issues promptly, and conducting regular inspections of the brickwork. This proactive approach is presented as essential for extending the life of the brickwork and minimizing the need for repairs.
- Maintain Proper Drainage: Ensure that water flows away from your home’s foundation to prevent moisture-related issues.
- Address Foundational Issues: If you notice signs of settling or movement, consult a professional to address these issues promptly.
- Regular Inspections: Periodically inspect your brickwork for early signs of damage or wear. Early detection can prevent minor issues from becoming major problems.
Conclusion
In conclusion, mastering how to repair cracked brick is not just about fixing a cosmetic issue, but it’s about preserving the structural integrity of your property. With the right approach, materials, and techniques, you can effectively mend the cracks and prevent future damage. Remember, regular inspection and timely repair are key to maintaining the durability and beauty of your brickwork, keeping your home safe and appealing for years to come.
FAQs
Q: How to Repair Cracked Brick Safely?
A: To repair cracked brick safely, always wear protective gear, including gloves and safety glasses. Ensure you use the right tools and follow the step-by-step process carefully to avoid further damage.
Q: Can DIY Techniques Fix How to Repair Cracked Brick?
A: Yes, DIY techniques can be effective for minor cracks. However, for extensive damage or structural issues, it’s advisable to consult a professional for how to repair cracked brick.
Q: What Materials are Needed for How to Repair Cracked Brick?
A: Essential materials include a masonry chisel, hammer, wire brush, mortar mix, trowel, pointing tool, and safety equipment. Choosing the right mortar mix is crucial for a lasting repair.
Q: How Long Does it Take to Repair Cracked Brick?
A: The time to repair cracked brick varies. Simple repairs can take a few hours, including cleaning, mortar application, and curing. Larger or more complex repairs might require more time.
Q: How to Prevent Cracks in Brick Walls?
A: To prevent cracks, maintain proper drainage, address foundation issues promptly, and conduct regular inspections. Preventative measures are vital in the long-term maintenance of brick walls.