
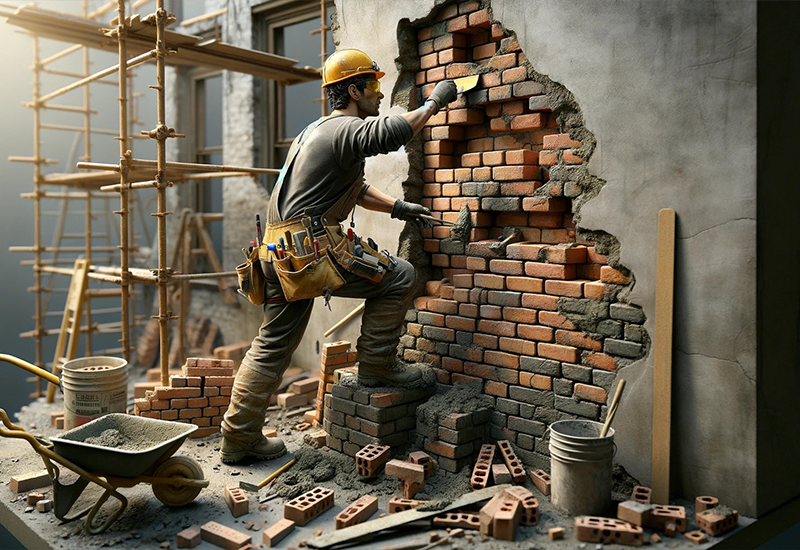
Ever come across a noticeable hole in your brick wall and wondered, “How to repair hole in brick wall?” Well, you’re certainly not alone in this! Tackling a hole in a brick wall may appear daunting at first, but it’s a completely manageable DIY project. With some basic tools and the right techniques, you can effectively restore the look and integrity of your wall. This guide is designed to walk you through the entire process of repairing a hole in a brick wall, ensuring you can accomplish this task with confidence and success.
Table of Contents
What You’ll Need: Gathering Your Tools and Materials
Before we dive into the repair process, let’s make sure you have everything you need. Here’s a quick checklist:
- Safety goggles and gloves: Safety first! Protect your eyes and hands.
- Chisel and hammer: You’ll use these to remove any damaged bricks carefully.
- Wire brush: This helps clean out the hole before you start the actual repair.
- Mortar mix: The ‘glue’ that holds everything together.
- Trowel: For applying and smoothing out the mortar.
- Bricks (matching your wall): The new bricks should match your existing wall to blend in seamlessly.
- Sponge and water: For the clean-up job after the repair.
Got everything? Awesome! Let’s get to work.
Step-by-Step Guide to Fixing a Hole in a Brick Wall
In this guide, we’ll walk through each step to seamlessly fix a hole in your brick wall, turning a daunting task into a manageable DIY project. From assessing the damage to the final touches, we’ve got you covered with practical tips and tricks.
Assessing the Damage: First Step in How to Repair Hole in Brick Wall
Alright, let’s get a good look at this hole. It’s essential to know whether it’s the mortar that’s crumbled or if the bricks themselves are the culprits. Sometimes, you’ll find it’s just the mortar that’s seen better days, and that’s a relatively straightforward fix. However, if the bricks are cracked or broken, brace yourself for a bit more work. Really understanding the extent of the damage here is crucial. It’s like being a detective, but for bricks. You’re gathering clues to figure out the best way to bring that wall back to its former glory.
Removing Damaged Bricks: Key to Successful Wall Repair
- Safety First: Remember, safety is non-negotiable. Goggles and gloves aren’t just accessories – they’re your DIY armor. Keep your peepers and paws safe, alright?
- Chisel Out Damaged Bricks: Now the real action starts. Grab your trusty chisel and hammer. It’s time to gently coax those damaged bricks out of their spots. Think of yourself as a surgeon here. You need to remove the bad bits without harming the healthy ones. Take it slow and steady. You’re not just knocking out bricks; you’re laying the groundwork for a seamless repair.
- Clean the Area: Done with the demolition? Great! Now, grab that wire brush and get scrubbing. Clear out all the old mortar crumbs, dust, and any other gunk that’s hanging around in there. This step is super important for making sure the new mortar has a clean, solid surface to stick to. Imagine you’re an archaeologist brushing away centuries of dust – but maybe don’t take quite that long.
Mixing Mortar and Preparing Bricks: Essentials in Wall Hole Repair
- Mix That Mortar: It’s time to play alchemist and mix up your mortar. Make sure to follow those package instructions to get the perfect consistency. You want it just the right kind of sticky. Think peanut butter, but for bricks.
- New Bricks on Deck: Now, about those new bricks. It’s like a game of Match. Make sure they’re the same size, shape, and color as the old ones. You want your wall to look like it never had a boo-boo.


Installing New Bricks: Piecing It Back Together
- Apply Mortar: Let’s get that mortar down. Scoop some up and spread a layer on the base of your hole. This is your brick’s new bed, so make it comfy.
- Brick in Place: Time to introduce the new brick to its new home. Set it down into the mortar, making sure it fits snugly and aligns nicely with its neighbors. We’re going for a harmonious look here.
- Mortar Joints: Now, with the finesse of a pastry chef decorating a cake, fill in around the brick with more mortar. Smooth it out so it blends seamlessly with the rest of the wall.
Finishing Touches: The Cleanup
- Sponge to the Rescue: Okay, got some mortar smudges on the surrounding bricks? No worries. A damp sponge is your eraser. Wipe away any excess mortar and leave that wall looking neat and tidy.
- Let it Set: Finally, give your handiwork some time to set. Mortar needs a bit of time to cure, usually about 24 hours. So, let it rest and resist the temptation to poke at it. Patience is a virtue, especially in brick repair.
Maintenance Tips: Keeping Your Wall Happy
- Regular Inspections: Every now and then, give your wall a once-over. Look for cracks, loose bricks, or mortar that might be giving up the ghost. Catching issues early can save you a lot of hassle down the line.
- Prompt Repairs: If you do find something amiss, don’t wait. A small fix now can prevent a big problem later. It’s like dental hygiene but for your wall.
Cost Table
| Materials | Estimated Cost |
| Safety Gear | $10 – $20 |
| Chisel and Hammer | $15 – $30 |
| Wire Brush | $5 – $10 |
| Mortar Mix | $10 – $20 |
| Bricks | $1 – $5 per brick |
| Trowel | $10 – $20 |
| Sponge | $1 – $3 |
Conclusion:
Congratulations, you now know how to repair hole in brick wall! With this new knowledge, you can confidently take on future wall repairs, saving time and money. Remember, the key is patience and precision. Your wall not only looks better, but you’ve also gained valuable DIY skills. So next time there’s a hole, you’ll be well-prepared to handle it with the same skill and confidence.
FAQs:
Q1: How long does it take to repair hole in brick wall?
A1: The time it takes to repair a hole in a brick wall depends on the size and severity of the damage. Generally, a basic repair can be completed in a few hours, plus drying time for the mortar.
Q2: Can I repair hole in brick wall in any weather?
A2: Ideal conditions for repairing a hole in a brick wall are dry, mild weather. Extreme temperatures or wet conditions can affect how the mortar sets and dries, potentially compromising the repair quality.
Q3: Do I need special tools to repair hole in brick wall?
A3: Basic tools required include a chisel, hammer, wire brush, trowel, and safety gear. These are generally enough for a straightforward repair. Sometimes, additional tools may be needed depending on the damage’s extent.
Q4: What type of mortar should I use to repair hole in brick wall?
A4: It’s best to use a mortar mix that matches the existing mortar in color and composition. For older walls, a lime-based mortar might be more suitable, while modern walls often use cement-based mortars.
Q5: How can I ensure my repair matches the rest of the wall?
A5: To ensure your repair blends in, use bricks that match the existing ones in size, color, and texture. Additionally, try to replicate the existing mortar joints’ style and depth for a seamless appearance.