
Learning how to repair mortar in brick is a vital skill for homeowners and DIY enthusiasts. This process, often known as repointing, is not just about fixing cracks or gaps; it’s about preserving the integrity and beauty of your brickwork. Whether you’re dealing with a charming old house or a modern brick structure, understanding the essentials of mortar repair can save you both time and money, while keeping your home looking its best.
Table of Contents
Fundamentals of Mortar Repair in Brickwork
Discover the importance and composition of mortar in brick construction and why it’s crucial for the stability and aesthetic of brick structures.
What is Mortar?
Mortar serves as a fundamental component in brick construction, functioning as a bonding agent that secures bricks together. It’s a mixture that usually comprises sand, a binder such as cement or lime, and water. The binder gives the mortar its strength and durability, while the sand provides bulk and volume, making it easier to work with. The correct ratio of these components is crucial, as it determines the mortar’s consistency, workability, and strength. This mixture is essential in ensuring that the brickwork is stable, weather-resistant, and visually appealing.
Why Mortar Fails
Mortar deterioration can occur for various reasons. Exposure to harsh weather conditions, like extreme temperatures and moisture, can lead to the mortar losing its bonding strength over time. Moisture infiltration, especially in climates with freeze-thaw cycles, can cause the mortar to expand and contract, leading to cracks and eventual crumbling. Structural settling can also stress the mortar joints. Even chemical reactions, such as salt efflorescence, can weaken mortar. Recognizing these signs of failure early is vital for maintaining the structural integrity and aesthetic quality of brick constructions.
Diagnosing Mortar Damage in Brick Structures
Learn how to expertly inspect your brickwork for signs of mortar damage and prepare with the right tools and materials for effective repairs.
Identifying Mortar Repair Needs in Bricks
Conduct a thorough inspection of your brickwork. Look for signs of mortar deterioration, such as cracks, crumbling, or areas where the mortar has fallen out entirely. Special attention should be paid to areas with significant exposure to elements, like external walls or foundations. Moisture-prone areas, like those near gutters or downspouts, should also be checked meticulously.
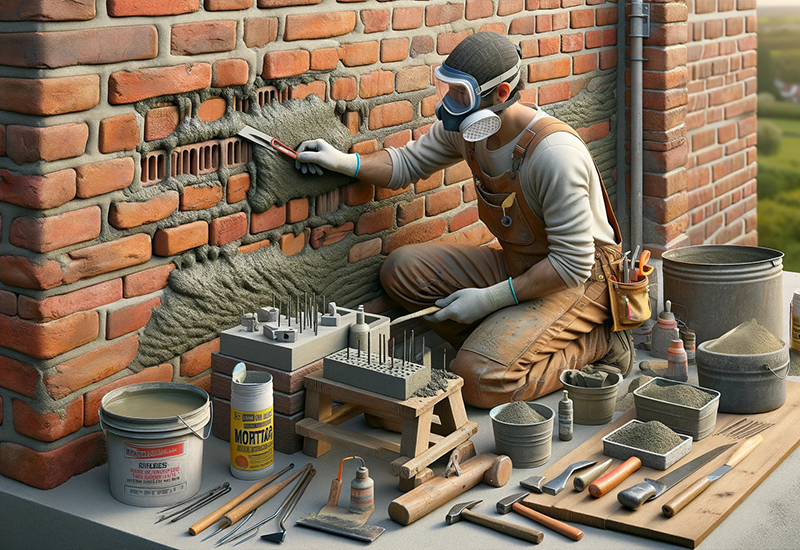
Gathering Tools and Materials for Mortar Restoration
The essential tools for mortar repair include a chisel and hammer for removing old mortar, a mortar hawk for holding fresh mortar, a trowel for applying it, a jointer for shaping joints, and a brush for cleaning. Regarding materials, you will need a mortar mix appropriate for your project, sand (if needed to adjust the mortar mix), and water. Safety gear is non-negotiable, with gloves to protect your hands, goggles to shield your eyes from dust, and a dust mask to avoid inhaling fine particles.
Table: Brick Mortar Repair Tools and Materials
| Tool/Material | Purpose |
| Chisel and Hammer | For removing old mortar |
| Mortar Hawk | To hold the mortar |
| Trowel | For applying and shaping mortar |
| Jointer | To smooth the mortar joints |
| Brush | For cleaning brick surfaces |
| Safety Gear (Gloves, Goggles, Dust Mask) | For personal protection |
| Mortar Mix | The material to fill the joints |
| Sand and Water | Components for mixing mortar |
Preparatory Steps for Mortar Restoration in Bricks
Understand the significance of safety measures and master the techniques of removing old mortar to set the foundation for successful mortar repair.
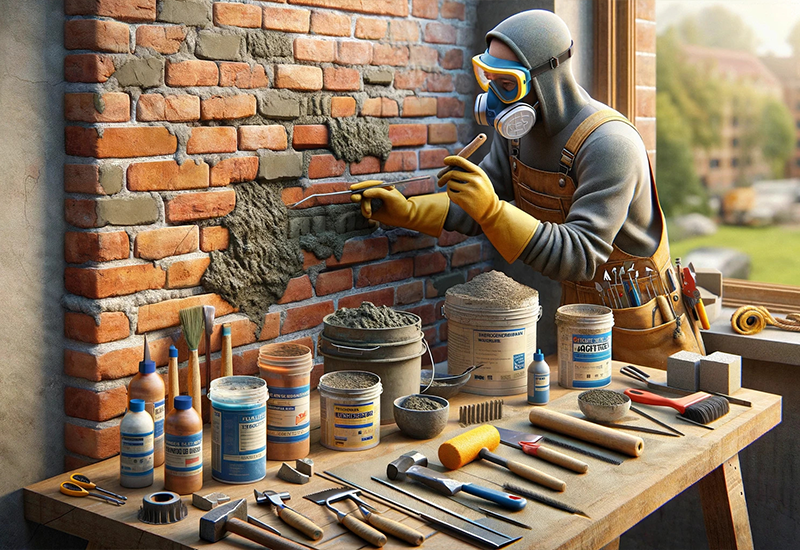
Essential Safety Gear for Mortar Repairs
Before you start, it’s crucial to gear up for safety. Wear sturdy gloves to protect your hands from sharp edges and abrasive materials. Safety glasses are a must to prevent dust and debris from getting into your eyes. A dust mask is also important, especially when you’re removing old mortar and mixing new mortar, to avoid inhaling any harmful particles.
Techniques for Efficient Mortar Removal
Removing old mortar is a delicate process that requires care and precision. Start by using your chisel and hammer to carefully chip away the damaged mortar. Be gentle to avoid damaging the bricks. Aim to remove the mortar to a depth of about half an inch, or until you reach solid mortar. This depth is typically sufficient for the new mortar to bond effectively. A hand-held vacuum or brush can be used to clear out dust and debris from the joints after chiseling.


Crafting the Perfect Mortar Mix for Brick Repairs
Let’s get our hands dirty and talk about choosing and mixing the perfect mortar for your repair job. It’s all about finding the right balance for a durable fix!
Selecting a Suitable Mortar Mix for Brickwork
The key to a successful repair lies in selecting the right mortar mix. The new mortar should match the existing one in strength, color, and texture. For historic or older homes, a lime-based mortar is often recommended as it offers flexibility and breathability, which are crucial for older bricks. In contrast, modern constructions typically benefit from a Portland cement-based mix, known for its higher strength and resistance to weathering. It’s essential to choose a mix that complements the existing structure to ensure longevity and visual consistency.
Detailed Guide to Mixing Mortar for Brick Repairs
Start by gradually adding water to your mortar mix until you reach the desired consistency. The goal is a firm, workable paste that sticks to your trowel without dripping. It’s crucial not to make the mix too wet, as this can weaken the mortar and cause shrinkage as it dries. Stir the mix thoroughly to ensure even distribution of moisture. The perfect consistency allows the mortar to hold its shape without sagging, making it easy to apply in joints.
Implementing New Mortar in Brick Joints
Now, the real fun begins! We’ll explore the techniques for filling those joints neatly and ensuring your handiwork looks great and lasts long.
Techniques for Filling Joints
Using your trowel, carefully press the new mortar into the joints, filling them completely. It’s important to pack the mortar tightly to avoid air pockets, which can lead to weaknesses. Work in small sections to ensure thorough coverage. Once filled, use a jointer tool to consolidate and shape the mortar. The objective is to achieve a joint finish that closely resembles the existing mortar in appearance and texture, ensuring a seamless repair.
Achieving a Smooth Finish in Mortar Repairs
After you’ve filled and shaped the joints, allow the mortar to set slightly. Then, carefully smooth out the surface for a neat, professional finish. This process might require some practice to master, but it’s crucial for achieving a durable and visually appealing result. Be patient and give the mortar enough time to start setting before final shaping.
The Art of Curing and Clean-up in Brick Mortar Repair
Patience is key here! We’ll go over the crucial steps for curing your mortar and tidying up afterwards to keep everything looking sharp.
The Curing Process: What You Need to Know
Mortar curing is a slow process, taking up to a month to fully strengthen. During this time, it’s essential to protect the new mortar from extreme temperatures and moisture. Avoid exposing the repaired area to direct sunlight, heavy rain, or freezing conditions, as these can compromise the curing process. Keeping the mortar damp can also help in achieving a stronger bond.
Cleaning Up After Mortar Repair
Once the repair is complete, it’s time to clean up. As the mortar begins to set, brush off any excess from the brick surface to prevent staining. Clean your tools immediately after use to prevent mortar from hardening on them. Proper cleaning and maintenance of your tools will extend their life and ensure they’re ready for your next project.
Maintenance Tips for Long-Lasting Brickwork
Keep your brickwork in tip-top shape with these maintenance tips. It’s all about being proactive to avoid bigger headaches down the line.
Regular Inspection and Maintenance
To prolong the life of your brickwork, regular inspections are crucial. Look for signs of mortar deterioration, such as cracks or crumbling, and address them promptly. Regular maintenance not only preserves the aesthetic appeal but also prevents minor issues from developing into significant problems, potentially saving time and money in the long run.
When to Call a Professional
While DIY mortar repair can be fulfilling, some situations call for professional intervention. If you’re dealing with extensive damage, structural concerns, or historic brickwork, it’s wise to consult a professional. They bring expertise and specialized skills, ensuring repairs are done correctly and in line with the historical integrity of the structure, if applicable.
Conclusion
In conclusion, knowing how to repair mortar in brick is an invaluable skill that enhances both the aesthetic and structural strength of your property. With the right tools, a bit of patience, and this step-by-step guide, anyone can perform these repairs. Regular maintenance and timely interventions will keep your brickwork in excellent condition for years, safeguarding the charm and value of your home.
FAQs
Q: How often should I check my brickwork for mortar repairs?
A: It’s wise to inspect your brickwork annually. Regular checks help spot any early signs of mortar wear, letting you address issues before they worsen.
Q: Can I repair mortar in wet conditions?
A: It’s best to avoid repairing mortar in wet conditions. Moisture can affect the curing process, leading to weak joints and potential damage in the future.
Q: How do I choose the right mortar mix?
A: The right mortar mix depends on your brickwork age and type. For older homes, a lime-based mortar is suitable, whereas modern constructions may require a cement-based mix.
Q: Is it necessary to remove all old mortar before repairs?
A: Yes, removing old, damaged mortar is crucial for a strong bond and long-lasting repair. Aim to remove mortar to a depth of about half an inch.
Q: How long does new mortar take to cure fully?
A: New mortar typically takes about a month to fully cure. It’s important to protect it from extreme weather during this period to ensure proper bonding.