

Hey there! Are you dealing with a loose brick but not keen on using mortar for the fix? You’re in the right place. Our guide on “repair loose brick without mortar” offers practical, straightforward solutions for this common issue. Whether it’s a quick fix or an aesthetic concern, understanding how to secure that pesky loose brick without the mess and fuss of mortar is a skill worth having. Let’s dive into the world of non-mortar brick repair and get that brick back in its place!
Table of Contents
Understanding the Basics of Brick Repair Without Mortar
So, you’ve got a loose brick and no mortar in sight, huh? No worries! Let’s break down the basics. There are times when you can’t (or don’t want to) use mortar for brick repairs. Maybe it’s about keeping the look clean or you need a quick fix. We’re going to dive into how you can do this, understanding the why, when, and how of non-mortar brick repair. It’s simpler than you think, and you might be surprised at just how effective these methods can be!
Why Choose Non-Mortar Methods?
Hey there! So, you’re wondering about fixing those pesky loose bricks but don’t want to deal with the hassle of mortar, right? Well, let me tell you, opting for non-mortar methods can be a real game-changer. These techniques are super quick and less messy – trust me, your clothes will thank you. Plus, you don’t need to be a DIY guru to pull them off.
Now, imagine you’ve got this beautiful brick feature in your home, but one brick is just slightly off. Using non-mortar methods, you can fix it up without leaving behind those pesky repair marks that scream, “Hey, I was fixed!” Great for keeping up appearances, right?
But, let’s keep it real. These non-mortar fixes are not the superheroes of all repairs. They might not hold up as well as traditional methods, especially on those walls that bear a lot of weight or in areas where the weather likes to show off. So, keep this in mind when deciding how to tackle your repair.
Situations for Best Use
Non-mortar repairs shine in a few scenarios:
- Decorative Brickwork: Got a fancy brick wall that’s more about looking good than holding up your house? Perfect match!
- Interior Walls: These are usually low-stress zones, so a non-mortar fix can work well.
- Quick Fixes: Need a temporary solution before bringing in the big guns? Non-mortar methods to the rescue!
- Time or Constraint Situations: If you’re short on time or can’t use mortar for some reason, these methods are your go-to.
Materials Needed for Non-Mortar Brick Repair
Alright, let’s talk tools and materials. It’s like going into a DIY battle – you gotta have the right armor and weapons.
- Brick Adhesive: This isn’t your average glue. It’s like the superhero of adhesives – strong, tough against weather, and doesn’t give in to temperature tantrums.
- Brick Clips: Think of these as your brick’s best friend. They hug your brick and keep it in place – no mess, no fuss.
- Cleaning Brushes: Before you start, you’ll need to clean up. These brushes will help you get rid of the old, crumbly stuff so your repair sticks.
- Protective Gear: Safety first, my friend! Goggles and gloves aren’t just a fashion statement; they’re your shield in the DIY battleground.
Table: Comparison of Tools
| Tool | Purpose | Benefits |
| Brick Adhesive | Binding bricks | Strong, weather-proof |
| Brick Clips | Holding bricks | Easy, no waiting around |
| Cleaning Brushes | Prep work | Gotta clean before you fix |
| Protective Gear | Safety | No ouchies or boo-boos |
There you go! With these tools and a bit of can-do attitude, you’re well on your way to fixing those bricks without the mess and fuss of mortar. Just remember, each method and tool has its own superhero strength, so choose wisely based on your brick’s needs!


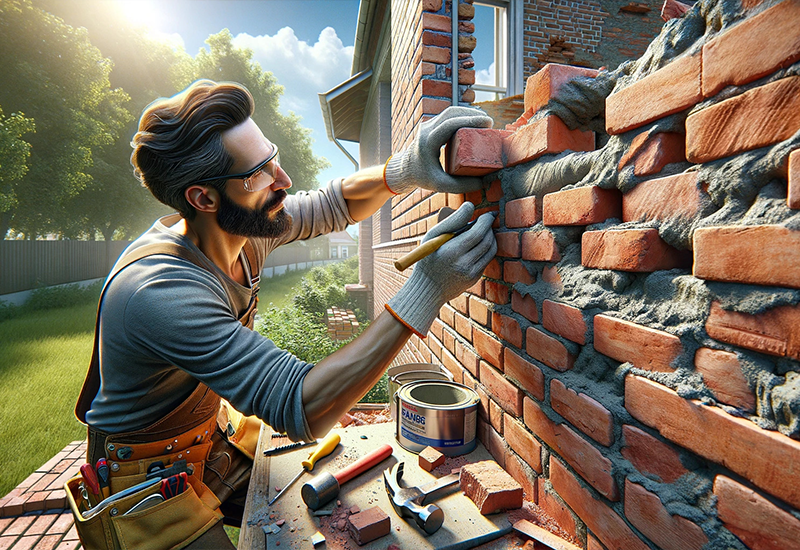
Step-by-Step Guide to Repair Loose Brick
Alright, let’s get into the nitty-gritty of fixing that loose brick, step by step. No mortar? No problem. We’ll start by assessing the situation and cleaning up. Then, I’ll walk you through the different methods you can use, like adhesive-based repair (hello, glue!) and mechanical fixing (think handy little clips). It’s about choosing the right approach for your brick situation. Let’s roll up those sleeves and get to work!
Initial Assessment and Preparation
Safety Considerations
Hey, safety first, right? Always gear up with safety glasses and gloves before you start. Make sure the area around the repair is free from people walking by, and any loose bits that might fall off should be secured. You wouldn’t want anything to fall on your foot!
Assessing the Brick and Surrounding Area
Take a good look at that brick. Is it just loose, or is it cracked too? Also, give a quick check to the bricks around it. If you see a bunch of them looking wobbly, it could mean there’s a bigger issue at play here, not just a one-off loose brick.
Cleaning the Brick and Area
Effective Cleaning Techniques
Alright, let’s clean up! Grab those brushes and gently scrub off all the dust, debris, and old mortar from the brick and its hole. It’s super important to get it all clean because the cleaner the surfaces, the better they’ll stick together.
Necessary Precautions
Be careful not to get water or cleaners in places that could get damaged or weaken the structure. And once you’ve cleaned it, make sure it’s completely dry before you move on to the next step.
Repair Methods
Adhesive-based Repair
Time for some glue action! Slather a generous amount of brick adhesive on both the brick and inside its cavity. Then, push the brick back into place firmly and clean up any glue that squishes out. Make sure you give it enough time to dry as per what the glue bottle says.
Mechanical Fixing Methods
Want a quicker fix? Try using brick clips. Just clip them onto the brick and slot it back in place. Super quick and easy, but remember, this is more of a temporary fix.
Ensuring Longevity of the Repair
You’ve fixed the brick – great job! But how do you make sure it stays put? We’re talking about keeping that repair solid for the long haul. Regular check-ups, understanding the impact of weather and environment, and knowing how to maintain your handiwork are key. This part is all about tips and tricks to ensure your brick stays in place and looks good as new for as long as possible. After all, nobody wants to do the same job twice!
Preventive Measures for Future Damage
Keep an eye on your handiwork, especially after rough weather. Regular checks will help catch any new movement or damage early on.
Environmental Factors to Consider
Keep tabs on the moisture levels, how much the temperature swings, and even if plants start growing too close to the bricks. All these can affect the stability of your repair job.
Maintenance Post-Repair
Cleaning and Caring for Repaired Brickwork
A little TLC goes a long way. Keep the brickwork clean to avoid any build-up that could damage it. But be gentle – you don’t want to knock that brick loose again.
When to Seek Professional Help
If the same spot keeps giving you trouble, or if you think there’s a bigger problem with the building’s structure, it’s time to call in the pros.
Case Studies and Success Stories
Now for the fun part – stories from people just like you who’ve been there, done that. We’ll look at real-life scenarios where homeowners and businesses used non-mortar methods to fix up their brickwork. From quick home repairs to big commercial projects, these stories will give you an idea of what works, what doesn’t, and how you can apply these lessons to your own brick repair journey. Prepare to be inspired by these success tales!
Residential Repair Scenarios
Examples of Successful Home Repairs
Check out these stories from homeowners who fixed up their bricks without using mortar. They’ll share what they did, the hurdles they faced, and how everything turned out.
Commercial Application Insights
How Businesses Benefited from Non-Mortar Repairs
Here, we’ll explore how some businesses managed to save time and money by fixing their bricks without mortar, keeping their buildings looking sharp and staying safe.
Conclusion
And there you have it! Repairing a loose brick without mortar isn’t just doable; it’s often the smarter choice for quick fixes and maintaining appearances. With the right tools, methods, and a bit of patience, you can handle this repair like a pro. Remember, the key to success lies in careful preparation, choosing the right adhesive or mechanical fix, and regular maintenance. Your brickwork can look as good as new without the hassle of mortar. Keep this guide handy, and you’ll be set for any loose brick situations that come your way!
FAQs
Q: How do I repair loose brick without mortar effectively?
A: Yes, you can repair loose brick without mortar successfully! Utilize strong adhesives or mechanical methods to ensure the brick stays firmly in place, perfect for non-structural repairs.
Q: What is the durability of repairs made to loose brick without mortar?
A: When you repair loose brick without mortar using quality adhesives, it can be quite lasting. The key is in proper application and ongoing maintenance of the brickwork.
Q: What tools are needed to repair loose brick without mortar?
A: To repair loose brick without mortar, you’ll need reliable brick adhesive or clips, cleaning brushes for surface prep, and safety gear to protect yourself during the repair.
Q: Can I repair loose brick without mortar in outdoor settings?
A: Yes, you can repair loose brick without mortar outdoors. However, it’s important to choose weather-resistant adhesives or mechanical fixings that can withstand external elements.
Q: What are the cost benefits of choosing to repair loose brick without mortar?
A: Opting to repair loose brick without mortar can be cost-effective as it often requires fewer materials and less labor compared to traditional mortar methods, saving both time and money.