

Exploring how to repair crumbling red bricks is a vital skill for maintaining the structural integrity and aesthetic value of your property. This process not only restores the durability of brickwork but also preserves the historical and architectural essence of buildings. From identifying the causes of deterioration to executing precise repair techniques, this guide delves into a comprehensive approach for revitalizing damaged red bricks, ensuring a seamless and enduring fix.
Table of Contents
Understanding the Problem: Why Red Bricks Crumble
The deterioration of red bricks is a challenge faced by many homeowners, particularly in older structures. Understanding why these bricks crumble is key to effective repair. This section delves into the common causes of brick degradation, such as weathering, moisture exposure, the quality of the bricks themselves, and natural wear over time. By comprehending these factors, one can better approach the repair process with appropriate solutions.
What Causes Brick Deterioration?
- Weathering and Moisture: Bricks endure constant exposure to weather elements. Moisture plays a significant role in deteriorating brick quality. It seeps into the pores, causing expansion and contraction, known as the freeze-thaw cycle. This repeated process gradually leads to cracks and eventual crumbling.
- Poor Quality Bricks: The quality of the bricks plays a crucial role in their durability. Bricks not fired correctly or made from substandard clay are less resilient to environmental stresses. Such bricks are more likely to deteriorate quicker than those of higher quality.
- Age-Related Wear: Older bricks, especially in historic buildings, were made differently than today’s bricks. They are generally more porous and less sturdy, contributing to a natural but gradual degradation over time.
Preparatory Steps Before Repairing: Assessing the Damage
Before commencing any repair work on crumbling red bricks, it’s crucial to properly assess the damage. This involves a detailed inspection of the brickwork to identify all the areas that require repair. Look for signs of severe deterioration, such as deep cracks, loose bricks, and areas where the mortar has significantly eroded.
Tools and Materials Needed:
For the repair process, you will need specific tools and materials. Here’s a list of essential items:
- Heavy-duty chisel: This will be used to remove the old mortar and to carefully chisel out the damaged bricks without harming the surrounding brickwork.
- Club hammer: This tool is ideal for use with the chisel to remove bricks and mortar.
- Replacement bricks: Ensure that these are similar in color, size, and texture to your existing bricks for a seamless repair.
- Mortar mix: Choose a mortar mix that is compatible with your brick type. For older brick structures, a lime-based mortar is often recommended.
- Brick trowel: Used for applying and shaping the mortar.
- Safety goggles: Essential to protect your eyes from brick dust and debris.
- Dust mask: To prevent inhalation of fine dust particles.
Safety Precautions:
Safety is paramount. Always wear safety goggles and a dust mask to protect yourself from brick dust and debris. Before starting, secure the area. Check for any loose bricks or unstable sections that might pose a risk during the repair process. Ensure that the work area is barricaded off, especially if it’s accessible to others.


Comprehensive Steps on How to Repair Crumbling Red Bricks
Repairing crumbling red bricks is a meticulous process that demands careful planning and execution. This section outlines a detailed, step-by-step approach to effectively address the issue. It begins with the assessment of damage and includes removing damaged bricks, cleaning the area, and preparing for the installation of new materials. This comprehensive guide ensures that even those new to brick repairs can follow along and achieve successful results.
Removing Damaged Bricks
Techniques for Safe Removal:
The first step in the repair process is to remove the damaged bricks. This requires careful execution to avoid further damaging the surrounding bricks.
- Begin by using the heavy-duty chisel and club hammer to gently chip away at the mortar around the damaged bricks.
- Place the chisel at an angle against the mortar and tap gently with the hammer. The goal is to loosen the mortar without exerting too much force on the brick.
- Gradually work around the entire perimeter of the damaged brick. Patience is key here – rushing this step can cause unnecessary damage.
- Once the mortar is sufficiently loosened, gently wiggle the chisel underneath the brick to lift it out of place.
- If the brick doesn’t easily come out, continue to gently chip away at the mortar until it can be removed without force.
Cleaning the Area:
After successfully removing the damaged bricks, it’s important to prepare the cavity for the new brick installation.
- Clear all loose debris, old mortar, and dust from the cavity. This can be done using a small brush or a hand broom.
- Ensure that the area is as clean as possible to provide a good surface for the new mortar to adhere to.
- Inspect the cavity for any hidden damage or loose mortar in the surrounding areas. It’s essential that the area is stable and ready to securely hold the new brick and mortar.
Proper preparation and execution of these initial steps are crucial for a successful repair job. Ensuring that the area is safe and properly prepared sets the foundation for the next steps in the repair process, where you will prepare and install the new bricks.
Selecting Materials for Repairing Crumbling Red Bricks
The success of a brick repair job significantly depends on the selection and preparation of materials. In this section, focus is placed on how to choose the right replacement bricks and mortar to match the existing structure. It also covers the critical aspects of mixing the mortar to the correct consistency, an essential skill to ensure the longevity and stability of the repair work.
Choosing the Right Materials:
- Brick Selection: Selecting the right replacement brick is crucial for maintaining the integrity and appearance of the structure. The new bricks should closely match the existing ones in terms of size, color, and texture. This similarity helps ensure that the repaired area blends seamlessly with the original structure. If the exact brick type is not available, consider using reclaimed bricks from similar-aged buildings or custom-made bricks.
- Mortar Selection: The choice of mortar is equally important. The new mortar should match the existing mortar’s strength, color, and composition. This is especially important in older structures where the mortar may be lime-based, rather than cement-based. Using the wrong type of mortar can lead to further deterioration, as the new mortar may not bond well with the old, or it may be too rigid or too flexible compared to the original material.
- Mixing the Mortar: Achieving the right consistency is key when mixing mortar. It should be pliable and easy to work with, but firm enough to hold its shape. A common mistake is making the mortar too wet, which can lead to shrinkage and a weak bond. Follow the manufacturer’s guidelines for mixing proportions and add water gradually. The ideal consistency is similar to peanut butter.
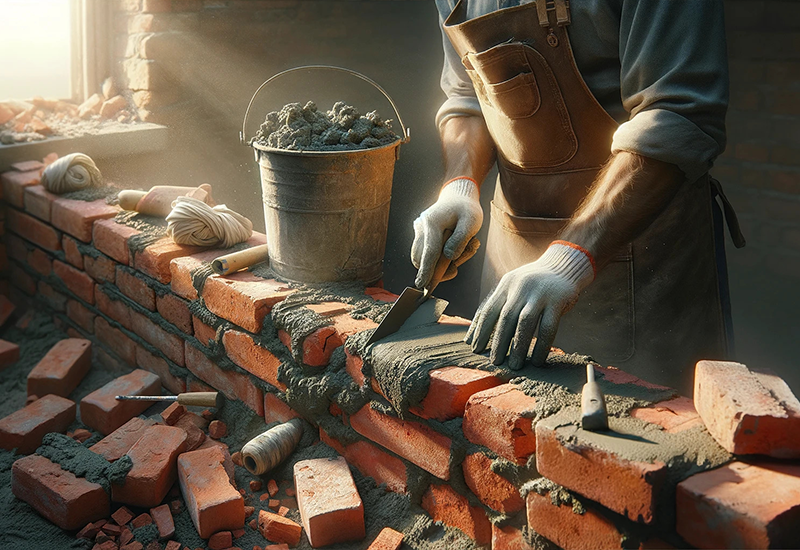
Executing Brick Replacement in Crumbling Red Brick Repair
This crucial phase in the repair process involves actual hands-on work of placing new bricks. The section provides guidance on how to securely and accurately install the new bricks, ensuring they align perfectly with the existing brickwork. Key tips on how to apply mortar, position the bricks, and ensure their stability are discussed, helping to restore the structural integrity and aesthetic appeal of the brickwork.
Securing the New Bricks:
- Apply a generous amount of mortar on the cleaned and prepared cavity and on all sides of the replacement brick. Position the brick in the cavity and press it firmly into place. Ensure that it sits at the same depth as the surrounding bricks to maintain a uniform surface.
- Ensuring Alignment and Stability: Once the brick is in place, use a level to check its alignment with the surrounding bricks. Adjust as necessary before the mortar sets. It’s vital to ensure that the new brick is properly aligned and level, as this affects not only the appearance but also the structural integrity of the wall. Remove any excess mortar with the trowel or pointing tool, smoothing out the joints to match the existing pattern.
Finalizing Red Brick Repairs: Pointing and Sealing Techniques
After replacing the bricks, the next essential step involves applying the finishing touches, crucial for the repair’s appearance and durability. The guide delves into pointing, the technique of filling and finishing the joints between bricks, detailing the necessary tools and techniques. It also highlights the importance of sealing the bricks to protect them against moisture and extend the repair’s life, offering advice on choosing the right sealant.
Pointing the Joints:
- Technique and Tools: Use a pointing trowel to apply mortar to the gaps between the bricks. This process, known as pointing or repointing, is essential for water-tightness and the overall strength of the brickwork. It’s important to replicate the style of the existing joints – whether they are flush, bucket handle, weather struck, or recessed.
- Achieving a Uniform Look: Matching the existing joint style and color is crucial for a cohesive look. This might require practice or even a sample section to perfect the technique, especially in visible areas.
Sealing the Bricks:
- Benefits of Sealing: A sealant can greatly extend the life of the repair and the surrounding brickwork by providing a protective layer against moisture, which is a major cause of brick deterioration.
- Choosing the Right Sealant: Select a breathable sealant designed for brickwork. This type of sealant allows moisture already in the bricks to evaporate, preventing damage from trapped moisture.
Maintenance Tips After Repairing Crumbling Red Bricks
Maintaining repaired brickwork is as important as the repair process itself. This section offers advice on routine inspections, upkeep, and preventive measures to protect the integrity of the brickwork. It highlights the importance of monitoring for any signs of damage, maintaining proper drainage, and periodic reapplication of sealant. Moreover, guidance is provided on when to seek professional help, especially for extensive damage or historical structures.
Routine Inspection and Upkeep:
- Regularly inspect the brickwork for signs of damage like cracks or loose mortar. Early detection of problems can prevent more serious damage.
- Keep gutters, downspouts, and drainage areas clear to prevent water accumulation that can lead to brick damage.
- Reapply sealant as needed, usually every few years, depending on the product and environmental conditions.
- When to Seek Professional Help: If you encounter extensive damage, or if the building is historic and requires specialized care, it’s wise to consult a professional. They can provide expertise in matching materials and techniques appropriate for the age and style of the building.
Conclusion:
In conclusion, mastering how to repair crumbling red bricks is an essential aspect of building maintenance and restoration. This detailed guide not only equips you with the knowledge to tackle brick deterioration but also instills a sense of confidence in preserving the longevity and beauty of your brick structures. With the right tools, materials, and techniques, you can successfully restore the strength and charm of your brickwork, ensuring it stands the test of time.
FAQs:
Q: What are the common causes of red bricks crumbling?
A: The common causes of red bricks crumbling are weathering, moisture infiltration, using poor-quality bricks, and age-related wear. Understanding these causes is vital for knowing how to repair crumbling red bricks effectively.
Q: How often should I inspect my red brickwork for signs of damage?
A: It’s advisable to inspect your red brickwork at least annually for damage. Regular checks are crucial for early problem identification, which is a key part of how to repair crumbling red bricks successfully.
Q: Can I perform red brick repairs myself, or should I hire a professional?
A: Basic repairs can be a DIY project as part of how to repair crumbling red bricks. However, for complex or extensive damage, especially in historical structures, the expertise of a professional might be necessary.
Q: What type of mortar should I use for repairing crumbling red bricks?
A: When learning how to repair crumbling red bricks, it’s crucial to use a mortar that matches the existing one in strength and color. Often, a lime-based mortar is suitable for older bricks.
Q: Is sealing newly repaired red brickwork necessary?
A: Yes, sealing newly repaired red brickwork is a crucial final step in the process of how to repair crumbling red bricks. This step protects against moisture penetration and is essential for extending the longevity of the repairs.