
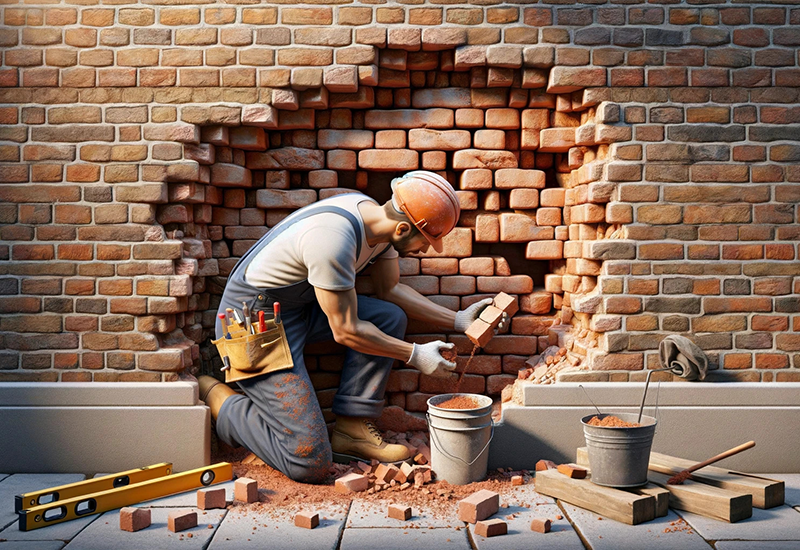
Repairing a large hole in a brick wall doesn’t have to be intimidating. In this comprehensive guide, we’ll walk you through 8 straightforward steps to fix that unsightly gap. From assessing the damage to applying the finishing touches, our aim is to provide practical, easy-to-follow advice. Whether you’re a seasoned DIY enthusiast or a first-timer, this guide will equip you with the knowledge and confidence needed to repair a large hole in a brick wall. Get ready to transform that blemish in your wall into a testament to your handiwork!
Table of Contents
Understanding the Basics of Brick Wall Repair
Let’s start our brick wall repair adventure by getting to the bottom of what we’re dealing with. In this section, we’ll uncover the common reasons behind those pesky large holes in brick walls. Is it weather wear, an accidental impact, or something else? Knowing the cause is key to a lasting repair. Plus, we’ll go through the essential toolkit you’ll need. Think of this as laying the groundwork before diving into the actual repair steps. Ready to get a bit more hands-on with your home improvement skills? Let’s do this!
What causes large holes in brick walls?
Hey there! Before we jump into fixing that large hole in your brick wall, let’s chat about what might have caused it. It’s like being a detective in your own home. These holes can pop up for various reasons. Sometimes, it’s due to environmental factors, like extreme weather conditions – think heavy rains or frost that can make bricks crack and crumble. Other times, it could be mechanical impact – maybe a stray cricket ball went rogue, or you had a little accident while moving furniture. And then there are structural issues; as buildings settle over time, stress can cause cracks that grow into larger openings. Understanding the cause is crucial because it helps you tackle the repair more effectively. You wouldn’t want to fix it up only to have it happen again, right?
Tools and materials needed for repair
Alright, time to gather our tools and materials! Imagine you’re gearing up for an exciting DIY project because, well, you are! Here’s what you’ll need:
- Bricks: Obviously, you’ll need some new bricks. Try to match them to your wall for a seamless look.
- Mortar: This is what holds the bricks together. Get the right type for your wall – your local hardware store can help with that.
- Trowel: It’s like a small hand shovel, perfect for applying and smoothing the mortar.
- Hammer and Chisel: These are for chipping away any loose or damaged bricks and mortar. Think of it as sculpting your wall.
- Wire Brush: This is to clean out the hole and ensure a neat job.
- Safety Glasses and Gloves: Safety first! Always protect your eyes and hands.
- Spirit Level: This is to ensure your bricks are perfectly straight. Nobody wants a wonky wall, right?
- Sponge and Bucket of Water: For cleaning up any excess mortar and keeping your work tidy.
- Stiff Bristle Brush: Ideal for brushing off any excess mortar from the brickwork.
Gathering these items might feel like preparing for a mini adventure in home improvement. Remember, having the right tools and materials is half the battle in DIY projects. The rest is all about the fun of fixing things up!
Now that we’re well-prepared with the knowledge of what caused the issue and the necessary tools at hand, we’re all set to dive into the heart of our project – the repair itself. Up next, let’s explore the 8 essential steps that will take you through repairing the large hole in your brick wall, transforming a daunting task into a satisfying DIY achievement. Get ready, because we’re about to turn this challenge into a success story!
Step 1: Safety First in Repairing a Large Hole in a Brick Wall
Preparing the Work Area
Hey there, DIY hero! Before we start mixing mortar and laying bricks, let’s talk safety and prep. First things first, clear your work area. This isn’t just about having space to move around; it’s about avoiding accidents. Move any furniture, decorations, or garden tools away from the wall. Next, cover the ground and nearby items with a drop cloth or some old sheets. This helps with easy cleanup later and protects your stuff from dust and mortar splatters. Think of it as setting the stage for your repair performance!
Wearing the Right Protective Gear
Now, let’s gear up! Safety gear isn’t just for show – it’s essential. Grab a pair of sturdy gloves to protect your hands from sharp edges and rough materials. Don’t forget safety glasses, because flying debris and dust are real. And if you’re sensitive to dust or working in a less ventilated area, a dust mask or respirator is a smart choice. Dressing for the job makes a world of difference. You’re not just fixing a wall; you’re being a responsible, safety-conscious DIY-er!
Step 2: Assessing the Damage of the Brick Wall Hole
Determining the Extent of the Hole
Alright, now let’s examine the damage. How big is this hole, really? Take a closer look and maybe measure it. This isn’t just about the visible hole; it’s also about spotting any hidden cracks around it. Sometimes, the damage is more than meets the eye, so it’s crucial to assess everything. This step is like being a doctor for your wall – you’re diagnosing the problem before deciding on the best treatment.
Deciding on the Approach for Repair
Based on your damage assessment, it’s decision time. If the hole is small to moderate, you’re likely good to handle it yourself. But if it’s large or involves structural damage, it might be time to call in a professional. Remember, there’s no shame in seeking help for complex repairs. For DIY repairs, consider the tools and materials you’ll need, and think about the time it’ll take. Planning is key to a successful repair. It’s like mapping out a strategy for victory – in this case, a beautifully repaired brick wall!
Step 3: Removing Damaged Bricks and Debris
Techniques for removing broken bricks
Alright, time to get your hands dirty! The first thing in repairing your wall is to get rid of the damaged bricks. This can be oddly satisfying, like peeling off a bandage. You’ll want to use your hammer and chisel here. Gently tap the chisel with the hammer around the edges of the damaged bricks. The trick is to do it gently enough to avoid damaging the good bricks. Think of it as surgery for your wall. Once you’ve loosened the bricks, carefully remove them. Some might require a bit more coaxing than others.
Cleaning the area for new bricks
With the damaged bricks out of the way, grab your wire brush and sweep out the hole. You want a nice, clean area for your new bricks to fit into. It’s like preparing a cozy bed in the wall for them. Removing all the dust, debris, and old mortar is crucial for the new bricks to adhere properly. Consider this step as setting the stage for your new bricks.
Step 4: Preparing New Bricks and Mortar
Selecting the right bricks and mortar
Now for a bit of shopping – you need new bricks and mortar. Choosing the right bricks is like finding the perfect puzzle piece – they should match your existing wall in size, color, and texture. As for the mortar, ask your local hardware store for advice based on your wall type. Getting the right mortar is like picking the right glue for a craft project – it needs to hold everything together.
Mixing mortar for bricklaying
Mixing mortar can be fun, like baking a cake for your wall. Follow the instructions on the mortar package. You’re aiming for a consistency that’s moist but not too wet – think of peanut butter. If it’s too dry, it won’t bind well; too wet, and it’s a messy affair. A good mix ensures your bricks will stay put for years to come.


Step 5: Rebuilding the Wall
Laying bricks in place
Here comes the rewarding part – laying the new bricks. Start by applying a layer of mortar on the base of the hole. Then, butter the end of your first brick with mortar and gently place it in the hole. Press it firmly into place. Imagine you’re building a LEGO wall, where every piece needs to fit just right.
Ensuring alignment and stability
As you lay each brick, use your spirit level to check that they’re straight. It’s like keeping a balance in life but for your wall. Take your time with this – properly aligned bricks are key to a stable and good-looking wall. Keep going until the hole is filled and the new bricks are in harmony with the old ones.
Step 6: Finishing Touches
Applying mortar and smoothing surfaces
Now that your bricks are in place, it’s time for the finishing touches, which can be quite satisfying. Apply additional mortar between the bricks using your trowel, filling any gaps. Think of it like icing a cake – you want it smooth and even. Then, with a striking tool or even a small piece of wood, gently press down the mortar to compact it. After that, use a damp sponge to smooth out the mortar and wipe away any excess. This step is about making everything look neat and tidy, blending the new with the old.
Matching the color and texture with the existing wall
This part is like being an artist. If your new bricks or mortar don’t perfectly match the existing ones, don’t worry. You can use pigments to color the mortar or even apply a thin wash of stain to the bricks to blend them in. It’s about creating a seamless look, so take your time to get it right. Matching the color and texture is all about paying attention to detail to make the repair virtually invisible.
Step 7: Curing and Cleaning Up
The curing process for mortar
Patience is key here. Mortar needs time to cure and reach its full strength. This usually takes about 24 to 48 hours, but it can vary depending on the weather and the type of mortar you’ve used. During this time, keep the newly laid bricks moist by lightly spraying them with water a few times a day. This helps the mortar cure evenly, preventing cracks and ensuring a strong bond.
Cleaning the work area and tools
After you’ve finished the hard work, it’s time to clean up. Rinse your tools with water before the mortar hardens on them. As for the work area, a good sweep and tidy-up will make it look like nothing ever happened. Remember, taking care of your tools means they’ll be ready for your next DIY adventure.
Step 8: Preventive Measures and Maintenance
Tips to prevent future damage
To avoid going through this again, let’s talk prevention. Check your walls regularly for any signs of damage like small cracks or loose bricks. Addressing these early can save you a lot of hassle. Make sure your drainage systems are clear to prevent water damage, and consider applying a sealant to your bricks to protect them from the elements.
Regular maintenance of brick walls
Regular maintenance is the secret to a long-lasting brick wall. This includes cleaning the walls, checking for vegetation growth, and ensuring that any pointing (the external part of mortar joints) is in good condition. It’s like giving your wall a regular health check-up, keeping it strong and looking great.
Comparison of Different Mortar Types
Hey, let’s take a quick look at different types of mortar. It’s like choosing the right ingredient for your favorite recipe – each type has its unique use and benefits. Here’s a handy table to break it down:
| Type | Composition | Ideal Use |
| Type N | Medium-Strength (General use) | Great for above-ground, exterior walls and interior load-bearing walls. Think of it as the all-rounder. |
| Type S | High-Strength | Perfect for areas where the wall needs more strength and better resistance to wind and soil pressure. Like the strongman of mortars. |
| Type M | Very High-Strength | Used for heavy loads and below-grade work, like foundations. It’s the heavy-duty option. |
| Type O | Low-Strength | Best for non-load bearing walls and indoor projects. It’s the gentle giant – strong but not too strong. |
| Type K | Very Low-Strength | Historical restoration where you need a softer mortar. It’s the specialist, for when you’re dealing with older, more delicate structures. |
This table should give you a good idea of what to pick depending on your wall’s needs. Remember, it’s all about matching the mortar to the job!
Conclusion
Congratulations on successfully completing your project to repair a large hole in a brick wall! With these 8 steps, you’ve not only restored the integrity of your wall but also added to your DIY skills. Remember, regular maintenance and early detection of issues can prevent future damage. We hope this guide has been a helpful companion in your repair journey. Armed with this knowledge, you’re now well-equipped to tackle similar challenges in the future. Happy repairing, and remember, every repair you do strengthens not just your walls, but also your skills as a DIYer!
FAQs
Q: Can I repair a large hole in a brick wall by myself?
A: Definitely! Repairing a large hole in a brick wall can be a fulfilling DIY project. With the right tools and some patience, tackling this task yourself is absolutely doable. Just remember, carefully following each step is vital to ensure a strong and durable repair of the large hole in your brick wall.
Q: What tools do I need to repair a large hole in a brick wall?
A: To prevent future damage and avoid the need to repair a large hole in your brick wall again, regular inspections are key. Check for any cracks or damage, ensure good drainage to prevent water buildup, and consider applying a sealant for extra protection. These proactive steps can help maintain the integrity of your brick wall and reduce the likelihood of having to repair a large hole in the future.
Q: How long does it take to repair a large hole in a brick wall?
A: The time it takes can vary, but generally, expect to spend a few hours over a couple of days. This includes removing damaged bricks, preparing and laying new ones, and then allowing the mortar to cure properly.
Q: How can I match the new bricks to my existing wall?
A: Matching new bricks to your existing wall involves selecting bricks that closely resemble the size, color, and texture of the existing ones. Sometimes, using pigments in your mortar or applying a stain to the bricks can help blend them in.
Q: What should I do to prevent future damage to my brick wall?
A: Regular inspections for cracks or damage, ensuring good drainage to prevent water buildup, and applying a sealant for weather protection are key steps. Addressing small issues early can prevent major repairs in the future.