
Tuckpointing is essential for maintaining the structural integrity and appearance of brick buildings. This process involves carefully removing damaged mortar and replacing it with new mortar, which not only improves the look of the brickwork but also extends its lifespan. By addressing gaps and deterioration in the mortar, tuckpointing helps prevent water damage and ensures that the bricks remain firmly in place. Whether you’re a homeowner looking to preserve your property or a professional contractor, understanding tuck pointing can save you time and money in the long run.
Table of Contents
What is Tuck Pointing?
Tuckpointing is the method of repairing mortar joints in brickwork. Over time, weathering and decay cause voids in the joints between bricks, allowing water to seep in and cause damage. Tuckpointing not only improves the appearance of brick structures but also protects them from further deterioration. Imagine your brick wall as a jigsaw puzzle. If the pieces (bricks) don’t fit tightly together, the puzzle isn’t complete, and the structure is weak. Tuckpointing fills in the gaps, ensuring everything fits snugly and securely.
When you look at a brick wall, the spaces between the bricks are filled with mortar. This mortar holds the bricks together and gives the wall strength. However, over time, the mortar can crack, crumble, or even fall out completely. This happens because of weather, age, or just the natural settling of the building. When the mortar is damaged, water can get into the wall. This water can cause more damage, making the wall weaker and less stable.
That’s where tuck pointing comes in. Tuckpointing is the process of removing the damaged mortar and replacing it with new mortar. This new mortar fills in the gaps, making the wall strong again. It also keeps water out, protecting the bricks and the wall itself.
History of Tuckpointing
The origins of tuck pointing date back to the late 18th century in England. Initially developed to mimic the appearance of fine brickwork, it quickly became a popular technique in masonry. The traditional method involved using two contrasting colors of mortar to create the illusion of thin joints, enhancing the aesthetic appeal of brick walls.
Back in the 1700s, brick buildings were a common sight in England. People wanted their buildings to look neat and well-crafted. However, bricks were often not perfect, and the joints between them could look uneven. Masons started using tuckpointing to make the walls look better. They used two different colors of mortar. One color matched the bricks, and the other created thin lines that made the joints look straight and even. This technique made the walls look like they had very thin, precise joints, even if the bricks were uneven.
Over time, tuck pointing spread to other parts of the world. It became a standard practice in masonry because it made buildings look good and kept them strong. Today, tuckpointing is still used to maintain the appearance and integrity of brick buildings. Whether you have an old historic building or a newer brick home, tuckpointing can help keep it looking its best and standing strong for many years.
The Importance of Tuck Pointing
Maintaining the mortar in your brickwork is crucial for several reasons. Let’s break down why tuck pointing is so important:
1. Structural Integrity
One of the main reasons for tuckpointing is to maintain the structural integrity of a building. Think of the mortar as the glue that holds the bricks together. When the mortar is damaged, the bricks can become loose, and the wall can start to shift or even collapse.
Imagine a brick wall with gaps where the mortar should be. These gaps weaken the wall, making it more likely to crumble. Tuckpointing fills these gaps, making sure the bricks are held firmly in place. This strengthens the wall and ensures it can support the weight above it. In older buildings, where the mortar has been exposed to years of weather and wear, this process is especially important to keep the structure safe and sound.
2. Water Resistance
Another critical reason for tuck pointing is to improve water resistance. Damaged or missing mortar allows water to seep into the wall. When water gets into the brickwork, it can cause a lot of problems. It might freeze and expand in cold weather, causing the bricks to crack. Over time, this can lead to serious structural damage.
By tuckpointing, you seal these gaps and prevent water from getting into the wall. This helps protect the bricks and the mortar from further damage. It’s like putting on a raincoat before going out in the rain – it keeps you dry and safe from the elements. Properly sealed joints ensure that water runs off the wall instead of soaking in, preserving the integrity of the brickwork.
3. Aesthetic Value
Finally, tuck pointing greatly enhances the aesthetic value of a building. Freshly tuckpointed brickwork looks clean and well-maintained. Over time, mortar can become discolored or erode, making the whole building look old and worn out.
Tuckpointing refreshes the appearance of the brickwork by replacing the old, damaged mortar with new, matching mortar. This makes the bricks look like they were just laid, giving the building a fresh, clean appearance. Whether you’re maintaining a historic building or just want your home to look its best, tuckpointing can make a big difference.
Additionally, good-looking brickwork can increase the value of your property. If you’re thinking about selling your home, well-maintained bricks can be a big selling point. Buyers will appreciate the care you’ve taken to keep the building in good shape, and it can make your home stand out in the real estate market.


How to Identify When Tuck pointing is Needed
It’s essential to know when your brickwork needs tuckpointing to maintain the integrity and appearance of your building. Here are some signs to look out for:
1. Crumbling or Missing Mortar
One of the most obvious signs that you need tuckpointing is crumbling or missing mortar. Over time, mortar can degrade due to weathering, age, and environmental factors. If you notice that the mortar between your bricks is starting to crumble or fall out, it’s a clear indication that tuckpointing is needed. You might see small piles of sandy debris at the base of your walls or even notice chunks of mortar missing from the joints.
2. Visible Gaps Between Bricks
Visible gaps between bricks are another sign that tuckpointing is necessary. These gaps can develop as the mortar erodes or as the building settles over time. If you can see spaces between your bricks where the mortar used to be, it’s time to consider tuckpointing. These gaps weaken the structure of the wall and can allow water to penetrate, leading to more serious damage.
3. Discolored or Stained Mortar
Discolored or stained mortar can also indicate the need for tuck pointing. Mortar that has changed color might be a sign of water damage or exposure to harsh elements. For instance, if the mortar has turned white (a process known as efflorescence), it means that water is drawing salts out of the mortar and depositing them on the surface. This not only looks unattractive but also signals that the mortar is deteriorating and needs to be replaced.
4. Water Leakage Through Walls
Water leakage through walls is a serious issue that often requires immediate attention. If you notice damp spots, water stains, or actual water seeping through your brick walls, it means the mortar joints are failing. Water intrusion can lead to mold growth, structural damage, and a host of other problems. Tuckpointing helps seal these leaks, protecting your building from further water damage and maintaining its integrity.
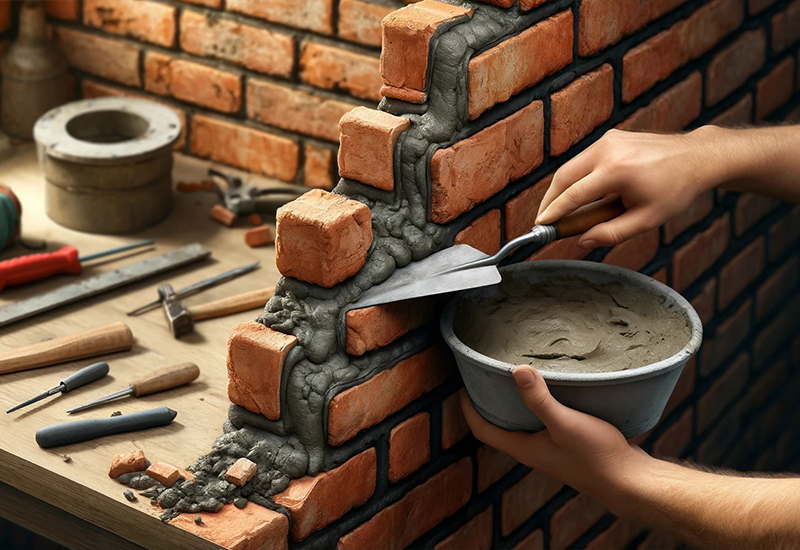
The Tuck Pointing Process
The tuck pointing process involves several steps, each crucial for a successful repair. Let’s break it down in detail so you can understand each part of the procedure.
1. Preparation
Before starting, ensure you have all the necessary tools and materials. Proper preparation is key to a smooth tuckpointing process.
Here’s a list of what you’ll need:
| Tools and Materials | Purpose |
| Hammer and Chisel | Removing old mortar |
| Tuckpointing Trowel | Applying new mortar |
| Mortar Mix | Replacing old mortar |
| Pointing Tool | Finishing touches |
| Wire Brush | Cleaning joints |
First, gather all your tools. Having everything on hand will make the process more efficient. You don’t want to be halfway through the job and realize you’re missing something essential. Make sure your work area is clean and safe. Remove any loose debris around the brickwork.
2. Removing Old Mortar
Carefully remove the damaged mortar using a hammer and chisel. This step requires patience and precision. Be sure to clean out the joints thoroughly to allow the new mortar to bond effectively.
Start by positioning the chisel at an angle in the mortar joint. Gently tap the hammer to loosen the old mortar. Work slowly to avoid damaging the bricks. Once the bulk of the mortar is removed, use a wire brush to clean out the joints. This ensures no loose particles remain, which can affect the bonding of the new mortar.
3. Mixing New Mortar
Prepare a batch of mortar that matches the color and consistency of the existing mortar. This helps maintain a uniform look.
Mix the mortar according to the manufacturer’s instructions. Consistency is crucial – it should be thick enough to hold its shape but not too dry. If the mortar is too wet, it won’t stay in place; if it’s too dry, it won’t bond well. A good test is to scoop some mortar onto your trowel and see if it holds its shape without slumping.
4. Applying New Mortar
Using a tuckpointing trowel, apply the new mortar into the joints. Ensure the mortar is packed tightly and smoothed out for a neat finish.
Start by loading some mortar onto your trowel. Press the mortar into the joint, filling the entire space. Use the edge of the trowel to smooth out the surface, ensuring there are no air pockets. Work in small sections to prevent the mortar from drying out before you can smooth it.
5. Finishing Touches
Once the mortar has set, use a pointing tool to create clean, defined lines. This step is essential for achieving the traditional tuckpointed look.
After the mortar has had time to partially set – it should be firm but still pliable – run the pointing tool along the joints. This will create smooth, straight lines that give the tuckpointing its characteristic appearance. Allow the mortar to cure completely before exposing it to water or heavy use.
Tools and Materials Needed for Tuck pointing
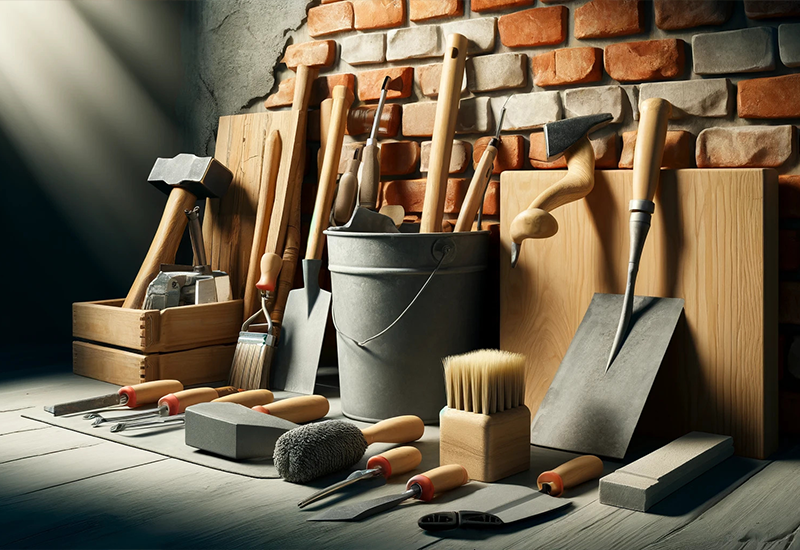
Having the right tools and materials is essential for effective tuck pointing. Let’s go through each item you’ll need and why it’s important. A well-prepared toolkit ensures that the tuckpointing process goes smoothly and efficiently.
1. Hammer and Chisel
Purpose: Removing old mortar
The hammer and chisel are your primary tools for getting rid of the old, damaged mortar. The chisel helps you chip away at the mortar without damaging the bricks. It’s crucial to be precise with these tools to avoid causing unnecessary harm to the brickwork. Use a chisel that is slightly narrower than the mortar joints for better accuracy.
2. Tuck pointing Trowel
Purpose: Applying new mortar
The tuckpointing trowel is specially designed for this job. It has a narrow, pointed blade that allows you to apply mortar into the joints neatly and accurately. The trowel helps you pack the mortar tightly into the joints, ensuring a strong bond and a clean finish.
3. Pointing Tool
Purpose: Finishing touches
After the mortar is applied and starts to set, the pointing tool comes into play. This tool is used to smooth and shape the mortar joints, giving them a clean, professional look. The pointing tool helps create uniform joints that are essential for both the structural integrity and the aesthetic appeal of the brickwork.
4. Mortar Mix
Purpose: Replacing old mortar
Choosing the right mortar mix is crucial. The new mortar should match the color and composition of the existing mortar as closely as possible. This not only maintains the visual consistency of the wall but also ensures that the new mortar bonds well with the old mortar and bricks. There are different types of mortar mixes available, so be sure to select one that suits your specific needs.
5. Brush
Purpose: Cleaning joints before applying new mortar
Before applying new mortar, it’s important to clean out the joints thoroughly. A wire brush is perfect for this job. It removes any remaining loose debris and dust, creating a clean surface for the new mortar to adhere to. Proper cleaning ensures a stronger bond and a longer-lasting repair.
Benefits of Tuckpointing
Tuckpointing offers numerous benefits beyond just aesthetic improvements. Let’s explore these advantages in detail to understand why this process is so valuable for brick structures.
1. Longevity
Properly maintained brickwork can last for decades. Tuck pointing helps ensure that your brick structures remain strong and durable over time. By filling in the gaps and replacing deteriorated mortar, you prevent further damage and extend the life of your brick walls.
When mortar joints start to crack and crumble, it compromises the structural integrity of the wall. Tuckpointing addresses this issue by restoring the mortar joints, making sure the bricks stay in place and the wall remains sturdy. Regular tuckpointing can prevent costly repairs in the future, saving you money in the long run.
2. Energy Efficiency
Sealed joints prevent drafts, improving insulation. One of the lesser-known benefits of tuckpointing is its impact on energy efficiency. When mortar joints are damaged, they can allow air to leak through the walls. This can lead to drafts and make your home less energy-efficient.
By tuckpointing, you seal these joints, reducing air leaks and improving insulation. This means your home can maintain a more consistent temperature, reducing the need for excessive heating or cooling. Improved insulation can lead to lower energy bills and a more comfortable living environment.
3. Property Value
Well-maintained brickwork increases the value of your home. The condition of your brickwork can significantly affect the overall appearance and value of your property. Potential buyers are more likely to be attracted to a home with well-maintained and visually appealing brickwork.
Tuckpointing enhances the curb appeal of your home by making the brick walls look fresh and well-kept. This not only makes a good first impression but also signals to buyers that the home has been well cared for. Investing in tuckpointing can therefore increase your property’s market value and make it more appealing to buyers.
DIY Tuckpointing vs. Professional Services
When it comes to tuckpointing, you have two main options: doing it yourself or hiring a professional. Each approach has its pros and cons, and it’s important to weigh them carefully before deciding which is best for you. Let’s dive into the details of each option.
DIY Tuckpointing
Doing tuckpointing yourself can be a great way to save money and learn new skills. However, it also requires a significant time investment and a good amount of patience. Here are some key points to consider:
- Cost-Effective: One of the biggest advantages of DIY tuckpointing is the cost savings. By doing the work yourself, you can avoid paying for labor, which can be quite expensive. This makes it a budget-friendly option, especially for smaller projects.
- Learning Experience: Tackling tuckpointing on your own can be a valuable learning experience. You’ll gain hands-on skills that can be useful for other home maintenance tasks. Plus, there’s a sense of satisfaction that comes from completing a project on your own.
- Time-Consuming: On the downside, DIY tuckpointing is time-consuming. The process requires meticulous attention to detail, and it can take a while to complete, especially if you’re not experienced. If you have a busy schedule, finding the time to do it properly might be challenging.
Professional Tuckpointing
Hiring a professional to do your tuckpointing can ensure the job is done correctly and safely. While it might be more expensive, the benefits often outweigh the costs. Here’s what you need to know:
- Expertise: Professionals bring a high level of expertise to the job. They have the skills and experience needed to handle various challenges that might arise during the tuckpointing process. This expertise ensures that the work is done correctly, reducing the risk of future issues.
- Quality: A professional tuckpointing job guarantees a high-quality finish. Pros have access to the right tools and materials, and they know how to use them effectively. This results in a neat, durable repair that enhances the appearance and longevity of your brickwork.
- Convenience: Hiring a professional is also more convenient. It saves you time and effort, allowing you to focus on other important tasks or simply enjoy your free time. You won’t have to worry about learning new skills or spending your weekends on a labor-intensive project.
Tuckpointing Costs
The cost of tuckpointing can vary significantly based on several factors. Understanding these factors will help you get a better idea of what to expect when planning your tuckpointing project. Let’s explore the details.
Average Cost
On average, you can expect to pay between $5 and $25 per square foot for tuckpointing. This range accounts for differences in labor, materials, and the overall complexity of the job. For a small section of brickwork, costs might be on the lower end, while extensive repairs or high-end materials can push costs higher.
Factors Influencing Cost
Several key factors influence the overall cost of tuckpointing. Here’s a detailed look at each one:
- Extent of Damage: The extent of the damage to your brickwork is a major cost factor. More extensive damage means more work is required, increasing labor costs. If large sections of mortar are missing or severely deteriorated, the job will take longer and require more materials.
- Type of Mortar: The type of mortar used can also impact costs. High-quality mortar designed to match historic brickwork or special architectural styles may be more expensive than standard mortar. Additionally, some mortars have specific properties, such as enhanced durability or color matching, which can affect the price.
- Location: Labor costs vary significantly by region. In areas with a high cost of living, such as major cities, labor rates will be higher. Conversely, in rural areas or regions with a lower cost of living, you might find more affordable rates. It’s essential to consider local labor costs when budgeting for tuckpointing.
Cost Breakdown
To give you a clearer picture, here’s a detailed breakdown of how these factors influence the overall cost of tuckpointing:
| Factor | Description | Impact on Cost |
| Extent of Damage | More extensive damage requires more work and materials | Increases cost |
| Type of Mortar | Higher quality or specialized mortar can be more expensive | Increases cost |
| Location | Labor costs vary by region; urban areas generally have higher rates | Can increase or decrease cost based on area |
Examples of Cost Scenarios
To better illustrate how these factors come together, let’s look at a few examples:
Scenario 1: Small Repair Job
- Extent of Damage: Minor
- Type of Mortar: Standard
- Location: Rural area
Estimated Cost: $5 – $10 per square foot
This scenario involves minor damage and standard mortar in a rural location, leading to lower overall costs.
Scenario 2: Large-Scale Restoration
- Extent of Damage: Extensive
- Type of Mortar: High-quality, historically accurate
- Location: Urban area
Estimated Cost: $20 – $25 per square foot
In this case, extensive damage, high-quality mortar, and urban labor rates contribute to higher costs.
Scenario 3: Moderate Repair Job
- Extent of Damage: Moderate
- Type of Mortar: Mid-range
- Location: Suburban area
Estimated Cost: $10 – $15 per square foot
This represents a middle-of-the-road scenario with moderate damage, mid-range mortar, and suburban labor rates.
Maintaining Your Brickwork Post-Tuckpointing
Proper maintenance can significantly extend the life of your tuckpointing, ensuring that your brickwork remains strong and looks great for many years. Here are some essential tips to keep your brickwork in top condition:
Regular Inspections
One of the most important steps in maintaining your brickwork is conducting regular inspections. Aim to check your brick walls at least once a year for any signs of damage or wear.
What to Look For:
- Cracks: Inspect the mortar joints and the bricks themselves for any cracks.
- Discoloration: Check for any changes in color, which might indicate water damage or mold growth.
- Loose Mortar: Gently press on the mortar joints to see if any are loose or crumbling.
By catching problems early, you can address them before they become more serious and costly.
Clean Gutters
Keeping your gutters clean is crucial for directing water away from your brick walls. Water is one of the main enemies of brickwork, as it can cause mortar to deteriorate and lead to structural issues.
How to Maintain Gutters:
- Regular Cleaning: Clean your gutters at least twice a year, in the spring and fall.
- Check for Blockages: Ensure there are no leaves, twigs, or other debris blocking the gutters.
- Inspect Downspouts: Make sure downspouts are clear and directing water away from the foundation of your home.
Properly maintained gutters help prevent water from seeping into your brickwork and causing damage.
Sealant Application
Applying a sealant to your brickwork can provide an extra layer of protection against the elements. A good sealant will repel water, preventing it from penetrating the mortar and bricks.
Steps to Apply Sealant:
- Clean the Surface: Before applying sealant, clean the brickwork thoroughly to remove dirt and debris.
- Choose the Right Sealant: Select a sealant that is specifically designed for brick and masonry.
- Apply Evenly: Use a brush or sprayer to apply the sealant evenly across the brickwork. Make sure to cover all mortar joints thoroughly.
- Allow to Dry: Let the sealant dry completely, following the manufacturer’s instructions for drying times.
Reapply the sealant every few years to maintain its effectiveness.
Common Mistakes to Avoid in Tuckpointing
Avoiding common mistakes in tuckpointing can ensure your brickwork remains strong and looks great for years to come. Here are the key errors to watch out for and how to avoid them.
Incorrect Mortar Mix
One of the most critical aspects of tuckpointing is using the correct mortar mix. Using a mix that doesn’t match your existing mortar can lead to issues with bonding and appearance.
Why It’s Important:
- Bonding: The new mortar needs to bond well with the old mortar and bricks to create a solid structure.
- Appearance: Mismatched mortar can be visually unappealing, especially if the color or texture differs from the original.
How to Avoid:
- Match Existing Mortar: Take a sample of your existing mortar to a masonry supply store. They can help you find a mortar mix that matches in both color and composition.
- Test Small Areas: Before committing to a large area, test the new mortar in a small, inconspicuous spot to ensure it matches.
Poor Removal Techniques
Removing old mortar incorrectly can damage the surrounding bricks, compromising the integrity of the wall.
Why It’s Important:
- Brick Damage: Aggressive removal methods can chip or crack bricks, leading to further repairs.
- Proper Bonding: Thoroughly cleaning out old mortar ensures the new mortar bonds properly.
How to Avoid:
- Use Appropriate Tools: Use a hammer and chisel or a specialized mortar removal tool to carefully chip away the old mortar.
- Work Slowly: Take your time to avoid damaging the bricks. It’s better to go slowly than to rush and cause unnecessary damage.
Improper Application
The way you apply new mortar can make a big difference in the quality and durability of the tuckpointing job.
Why It’s Important:
- Structural Integrity: Mortar that isn’t applied evenly or packed tightly can lead to weak spots and potential failure.
- Appearance: Uneven mortar can look messy and detract from the appearance of your brickwork.
How to Avoid:
- Apply Evenly: Use a tuckpointing trowel to apply the mortar evenly into the joints. Ensure that the mortar fills the joint completely.
- Pack Tightly: Press the mortar firmly into the joints to eliminate air pockets and create a strong bond.
- Smooth Finish: Use a pointing tool to smooth and shape the mortar joints for a clean, professional look.
Conclusion
In conclusion, tuck pointing is a crucial maintenance task that can significantly extend the life of your brickwork. By addressing the issues of deteriorating mortar, you can prevent structural damage and improve the aesthetic appeal of your property. Regular tuckpointing ensures that your brick walls remain sturdy and water-resistant, protecting your investment. If you are looking for a professional contractor for tuckpointing, contact us at +(1) 917-477-9667. We provide expert services to keep your brickwork in top condition.
FAQs
Q: What is tuckpointing and why is it important?
A: Tuck pointing is the process of removing and replacing damaged mortar in brickwork. It is important because it helps maintain the structural integrity of the building and prevents water damage. By keeping the mortar in good condition, you can ensure that the bricks stay in place and the wall remains strong.
Q: How often should tuckpointing be done?
A: Tuck pointing should be done every 20 to 30 years, depending on the condition of the mortar and exposure to the elements. Regular inspections can help determine when tuckpointing is needed. By addressing minor issues early, you can prevent more extensive and costly repairs later on.
Q: Can I do tuck pointing myself, or should I hire a professional?
A: While you can do tuck pointing yourself, it requires skill and patience to do it correctly. Hiring a professional ensures the job is done right and safely. A professional has the expertise and tools necessary to perform tuckpointing effectively, saving you time and effort.
Q: What are the signs that my brickwork needs tuck pointing?
A: Signs that your brickwork needs tuckpointing include crumbling or missing mortar, visible gaps between bricks, discolored mortar, and water leakage through walls. Regularly inspecting your brickwork can help you identify these signs early and take action to prevent further damage.
Q: How much does tuck pointing typically cost?
A: The cost of tuck pointing varies depending on the extent of the damage, the type of mortar used, and the location. On average, tuckpointing costs between $5 and $25 per square foot. Factors such as labor rates in your area and the quality of materials used can affect the overall price.